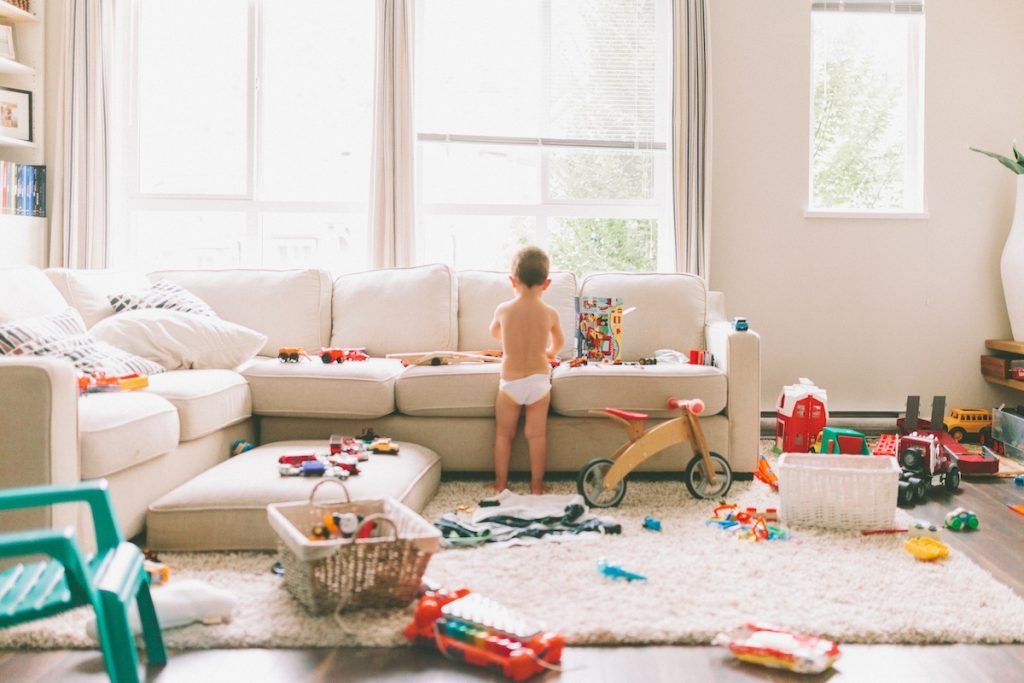
As parents, we know that toys multiply and spread throughout the home like magic. Therefore, to maintain a neat and tidy living space, organizing and storing toys well organized is important, making playtime a much happier and more pleasant experience.
From decluttering and categorizing to finding storage solutions and creating a functional play area, this guide will provide practical tips and strategies to simplify the toy organization process.
Step 1: Decluttering
Before diving into the organizing process, it’s crucial to declutter your child’s toy collection. Review each toy and consider the following question: Is it broken? Has it been outgrown? Is it missing pieces? Sorting the toys into three categories – keep, donate, and discard – will help you streamline the process. Donate toys in good condition but no longer used, and responsibly dispose of broken or damaged toys.
Assessing Toy Condition
What is the overall condition of your kids’ toys? Are there any signs of damage? This can be broken parts, sharp edges, or missing pieces. Toys that are beyond repair or potentially hazardous should be thrown out. Removing broken or unsafe toys creates a safer play environment, ensuring your child can enjoy their toys without any risks.
Age Appropriateness
Children’s interests and developmental needs change as they grow. During the decluttering process, take a moment to evaluate the age appropriateness of each toy. Consider whether the toys align with your child’s age and developmental stage. Toys that are too simple or challenging enough may no longer capture their interest. Removing no longer age-appropriate toys helps keep the play area focused on toys that stimulate your child’s growth and imagination.
Assessing Play Value
Toys should engage and entertain your child. As you declutter, think about the play value of each toy. It may be time to let go if a toy consistently goes untouched or no longer sparks joy. Removing toys that lack play value creates space for new toys that better align with your child’s evolving interests and preferences.
Managing Duplicates
Duplicated toys can quickly clutter the play area without providing any additional benefits. If you have multiple versions of the same toy, consider keeping only one and donating or discarding the rest. Assess which toy version is in the best condition or which one your child prefers. By reducing duplicates, you declutter the space and encourage your child to appreciate and engage with a wider variety of toys.
Sentimental Attachment
Toys often hold sentimental value, reminding us of special moments or significant milestones in our child’s life. While it’s important to consider sentimental value, be mindful of the available storage space. If a toy holds significant emotional attachment but is rarely played with, consider selecting a few special items to keep and find creative ways to commemorate or display them. By being selective with sentimental toys, you can balance preserving memories and maintaining an organized play area.
Storage Limitations
Assess the storage capacity and determine how many toys it can comfortably accommodate. Optimize your storage solutions based on the available room to create a clutter-free environment.
Involving Your Child
Explain to your kids why letting go of toys they no longer play with is important. Include and involve them in the decision-making process. This will also teach them that donating toys can bring joy to other children who may not have their own toys to play with or as many. By involving your child, you lighten your decluttering workload and foster a sense of responsibility and empathy in them.
Donation Options
When parting ways with toys, consider donating them to organizations, charities, or shelters in your community. Research local options that accept toy donations and ensure your donated toys are in good condition. Charitable organizations often have specific requirements for accepting toy donations, such as cleanliness, safety standards, and age appropriateness. Some organizations may focus on providing toys to underprivileged children, while others may specialize in supporting children’s hospitals or shelters.
It’s important to reach out to these organizations beforehand to understand their needs and donation process. Additionally, consider donating toys to schools, daycare centers, or community centers that may benefit from them. Educational institutions and community organizations often appreciate toy donations that enhance their programs or provide learning opportunities for needy children. Before donating, clean and sanitize the toys, ensuring they are in good working condition and free from any safety concerns. Removing batteries, if applicable, is also recommended to prevent any potential leakage or damage during storage or distribution.
Step 2: Categorizing
Categorizing Toys by Play Type
Grouping toys based on their play types can help you identify how your child engages with them. This could include categories like active play, pretend play, building and construction, problem-solving games, and creative arts.
Age and Development-Based Categorization
Consider categorizing toys based on your child’s age and developmental milestones. This ensures they can access toys suitable for their current abilities and interests.
Seasonal Categorization
If your child has toys specific to certain seasons or holidays, create categories for those toys. This will make rotating and storing them easier when not in use. Organize toys based on their size, especially if you have limited storage space. This allows you to utilize the available space efficiently and prevents larger toys from overtaking the play area.
Categorizing by Brand or Theme
If your kids have a particular affinity for certain toy brands or themes, consider creating categories based on those preferences. This can make it easier for them to find their favorite toys and also assist with future purchasing decisions.
Consideration of Shared Play
If you have multiple children or the play area is shared with others, consider creating categories that accommodate shared play. This ensures that toys are easily accessible and encourages cooperative play among siblings or friends.

Step 3: Storage Solutions
Choosing the right storage solutions is key to maintaining an organized toy collection. Here are a few options to consider:
- Clear Plastic Bins: Transparent bins allow easy visibility and help children effortlessly find and put away toys.
- Shelving Units: Invest in sturdy, child-friendly shelving units with adjustable shelves. These provide ample space for displaying toys and keeping them accessible.
- Toy Chests and Trunks: Ideal for storing larger toys or soft items like stuffed animals, toy chests and trunks offer a charming and functional storage solution.
- Hanging Organizers: These are perfect for smaller toys like action figures or art supplies. Hanging organizers can be hung on doors or walls to maximize vertical space.
- Bookshelves with Baskets: Combining book storage with baskets is an effective way to keep toys and books organized in one place.

Step 4: Rotation and Accessibility of Toys
Implementing a toy rotation system is a smart strategy to create a dynamic and engaging play environment for your child. Rather than overwhelming them with excessive toys, rotating toys can help keep playtime fresh, exciting, and clutter-free. Here’s how to make toy rotation seamless in your organizing and storage routine.
First, designate a separate storage area for the toys that are not currently in use. This could be a closet, a shelf, or even bins under the bed. Divide these toys into different categories or themes, making selecting the appropriate toys for rotation easier. Ideally, aim to have a mix of toys from various categories or play types.
Determine a suitable rotation schedule based on your child’s interests and attention span. Regularly assess which toys are capturing your child’s interest and rotate accordingly. To ensure accessibility, organizing the toys so your child can easily find and put away their toys independently is important. Place frequently used toys within their reach, either on lower shelves, in open bins, or easily accessible drawers. Use clear or picture labels to help your child identify where each toy belongs, making cleanup time a breeze.
Consider the layout of your play area as well. Arrange furniture and storage units in a way that promotes a sense of organization and encourages your child to participate in maintaining a tidy space. Make it a habit to involve your child in the cleanup process, teaching them the importance of responsibility and organization.

Step 5: Labels and Visuals
Labels and visuals are helpful tools, especially for younger children who may not be able to read yet. Use picture labels or simple words to identify toy categories and storage containers. This promotes independence and makes it easier for kids to find and return toys to their designated places.
Picture Labels
Create or use picture labels that represent different toy categories or specific toys. You can use images or photographs of the toys or find relevant pictures online. Attach these labels to bins, shelves, or drawers at your child’s eye level, making it easy for them to understand where each toy belongs. Picture labels aid in the organization and enhance your child’s cognitive development by reinforcing visual recognition skills.
Color-Coded Labels
Implementing a color-coded labeling system adds an extra layer of organization and visual appeal to your child’s play area. Assign specific colors to different toy categories or play types. For example, you can use blue for building toys, red for art supplies, or green for outdoor play items. Place color-coded labels on storage containers, shelves, or drawers to visually indicate where each category of toys belongs. This system allows your child to easily identify and retrieve their toys, fostering independence and a sense of order. Moreover, color-coded labels make cleanup time more engaging, as children can sort toys based on their designated colors.
Storage Container Labels
Labeling storage containers or bins is an effective way to maintain an organized play area. Attach labels directly to the containers, indicating the corresponding toy category or theme. This labeling method helps you and your child quickly identify where each toy belongs, simplifying cleanup and ensuring a tidy space. There are various options for storage container labels, including adhesive labels, chalkboard labels, or label holders. Choose the labeling method that suits your preference and provides a clean and organized look to the storage area.
Display Shelves or Cubbies
Display shelves or cubbies showcase your child’s toys and serve as a labeling opportunity. Label each section or cubby with the corresponding toy category, making it visually appealing and functional. Whether you opt for adhesive labels, chalkboard labels, or label holders, ensure they are securely attached and easily visible. This labeling method helps your child easily locate specific toys, encourages them to put them back in their designated spots, and adds an organized and aesthetically pleasing touch to the play area.
Velcro or Magnet Labels
Consider using Velcro or magnet labels for a flexible and adjustable labeling option. Attach one side of the Velcro or a magnet to the containers, shelves, or cubbies and the other to the labels themselves. This allows you to move or change the labels as you reorganize your toy collection or introduce new toys. Velcro or magnet labels are especially useful when you have rotating toy categories or frequently changing themes. This versatile labeling solution allows you to easily adapt and maintain an organized play area that evolves with your child’s interests and growth.
Visual Instructions for Cleanup
Create visual instructions or step-by-step guides to make cleanup time more manageable for your child. Use pictures, drawings, or icons to illustrate the process of putting toys away. Break down the cleanup tasks into simple and sequential steps, such as gathering all the building blocks, returning dolls to their dollhouse, or placing art supplies in their designated bin. Display these visual instructions in the play area or near the storage area as a helpful reminder for your child. Visual instructions provide a clear and tangible guide, making it easier for your child to follow and complete cleanup tasks independently.

Step 6: Clean-Up Routine
Establishing a regular clean-up routine is crucial in maintaining an organized play area and teaching your child valuable life skills. Setting a designated time each day or before bed for clean-up creates a structured habit that instills responsibility and tidiness.
- Turn it into a race: Set a timer and challenge your child to clean up their toys before the time runs out. Make it exciting by cheering them on and celebrating their accomplishments.
- Play upbeat music: Create a clean-up playlist with your child’s favorite songs. Music can energize the atmosphere and make the clean-up process more enjoyable.
- Use a cleaning-themed dance party: Encourage your child to dance and groove while they tidy up. Make up silly cleaning moves together or create a “clean-up dance” that they can follow.
- Make it a scavenger hunt: Create a list of specific toys or items that must be put away. Turn the clean-up process into a scavenger hunt where your child searches for the items on the list and puts them in their designated places.
- Implement a reward system: Create a simple reward system to motivate your child. For every successful clean-up session, offer a sticker, a small treat, or the opportunity to choose a special activity afterward.
- Use colorful bins or storage containers: Invest in colorful bins or containers for toy storage. Let your child choose their favorite colors or decorate the containers with stickers or drawings. This adds a playful touch to the clean-up routine.
- Make clean-up time a bonding activity: Clean up alongside your child, making it a joint effort. Engage in conversation, sing songs, or share stories while tidying up together. This not only makes clean-up more enjoyable but also creates quality bonding time.
- Offer praise and encouragement: Celebrate your child’s efforts and acknowledge their accomplishments during clean-up. Use encouragement, high-fives, or special praise to make them proud of their achievements.
- Break it down into smaller tasks: If the clean-up seems overwhelming, break it down into smaller tasks. Create a checklist or visual chart with each task represented by a picture or word. Your child can check off each task as they complete it, providing a sense of accomplishment.
- Create a clean-up routine chart: Design a colorful chart that outlines the steps of the clean-up routine. Use visuals or words to guide your child through the process. They can move a sticker or marker along the chart as they complete each step, making it visually satisfying and rewarding.
A Final Word
Flexibility is key as you begin organizing and storing your child’s toys. As your child grows, their interests and toy preferences may change. Adjust the organization system accordingly, regularly reassessing and fine-tuning to meet their evolving needs. Embrace the opportunity to bond with your child during clean-up, turning it into a fun and engaging activity. You can transform clean-up from a mundane task into a joyous adventure by infusing playfulness, music, and rewards. Ultimately, an organized play area promotes not only a sense of order but also a sense of pride and ownership in your child.